-
4.
Articles
Articles make up the core content of the uniFi+activ or uniFi+display.
-
4.1
Basic Articles
Basic articles contains title, text and media (images, video, sound) and optionally author information and links to other articles, presentations and widgets.
These can be displayed on a uniFi+activ either directly or as content of "Basic" presentations, as points on a "Map" or as location descriptions in "Wayfinding".
On uniFi+displays articles are shown in a fullscreen window of two fields: One for texts and one for the attached media (as animated slides).
Basic articles are attached to uniFi+displays and uniFi+idles directly or using "Basic" presentations.Articles are reusable - the same article can be attached to multiple presentations across +activ, +display and +idle screens.
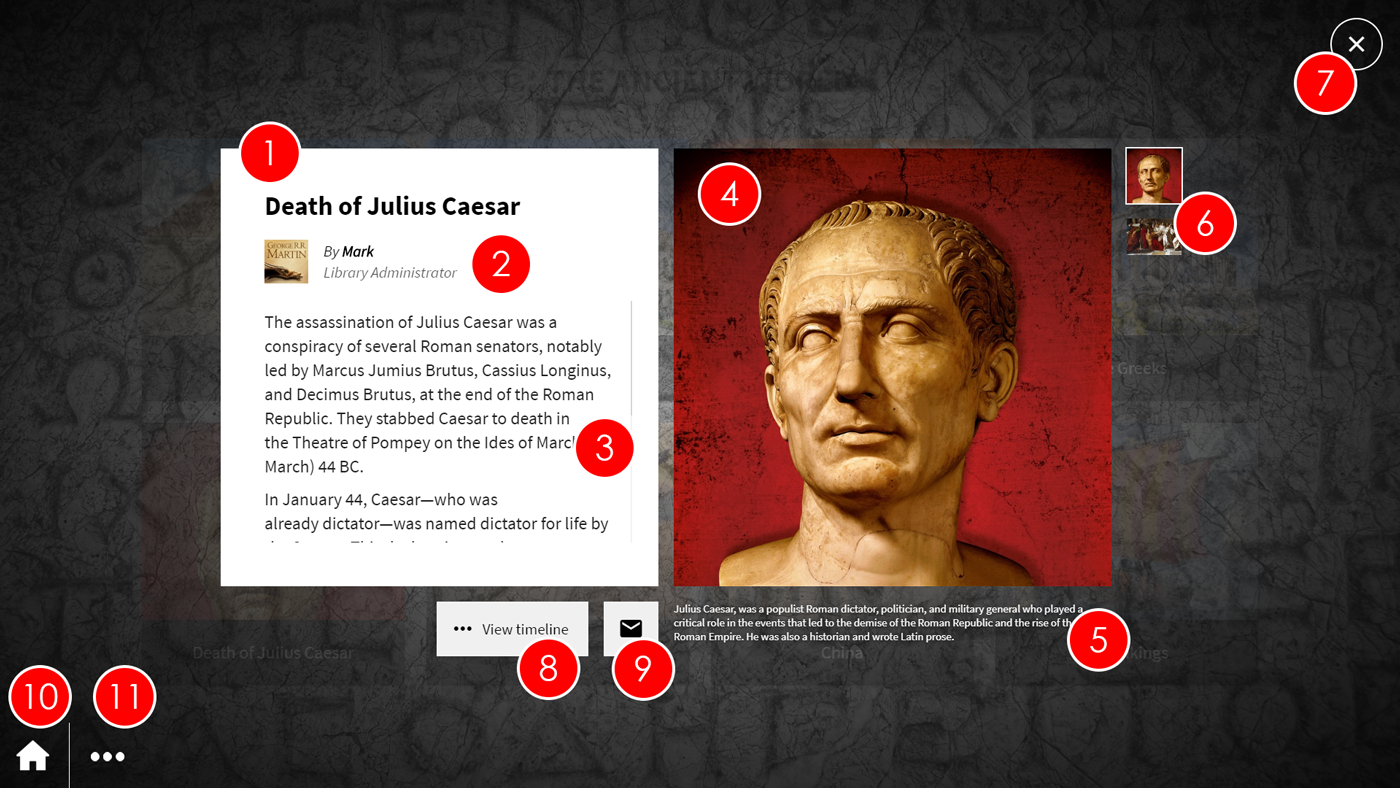
Basic article shown on a uniFi+activ- Title - This is the title of the article. It should be short and to the point (e.g. Death of Julius Caesar, Summer Fair - August 14th, Matilda by Roald Dahl)
- Author image and details - This is the image, name and position of the article author. It is optional.
- Article Text - This is the main article text and is always displayed. The text can be scrolled on screen so the article can contain a lot of text. However, it is recommended that you add some text to the images and media files to avoid the user having to scroll too much on the article text, and make the image / media file text more interesting.
- Current image / media - This is the current image that is being displayed from the associated images and media files for the article. If the patron presses on the image, it will prompt a larger version of the image to be displayed. The image will be replaced by the next image or media file in the roll after a configurable time.
- Current image / media text - This is the text that is associated to the image currently being displayed. If the text is too long, only the beginning of the text will be shown. If the image is pressed, the whole text will be displayed next to a larger version of the image.
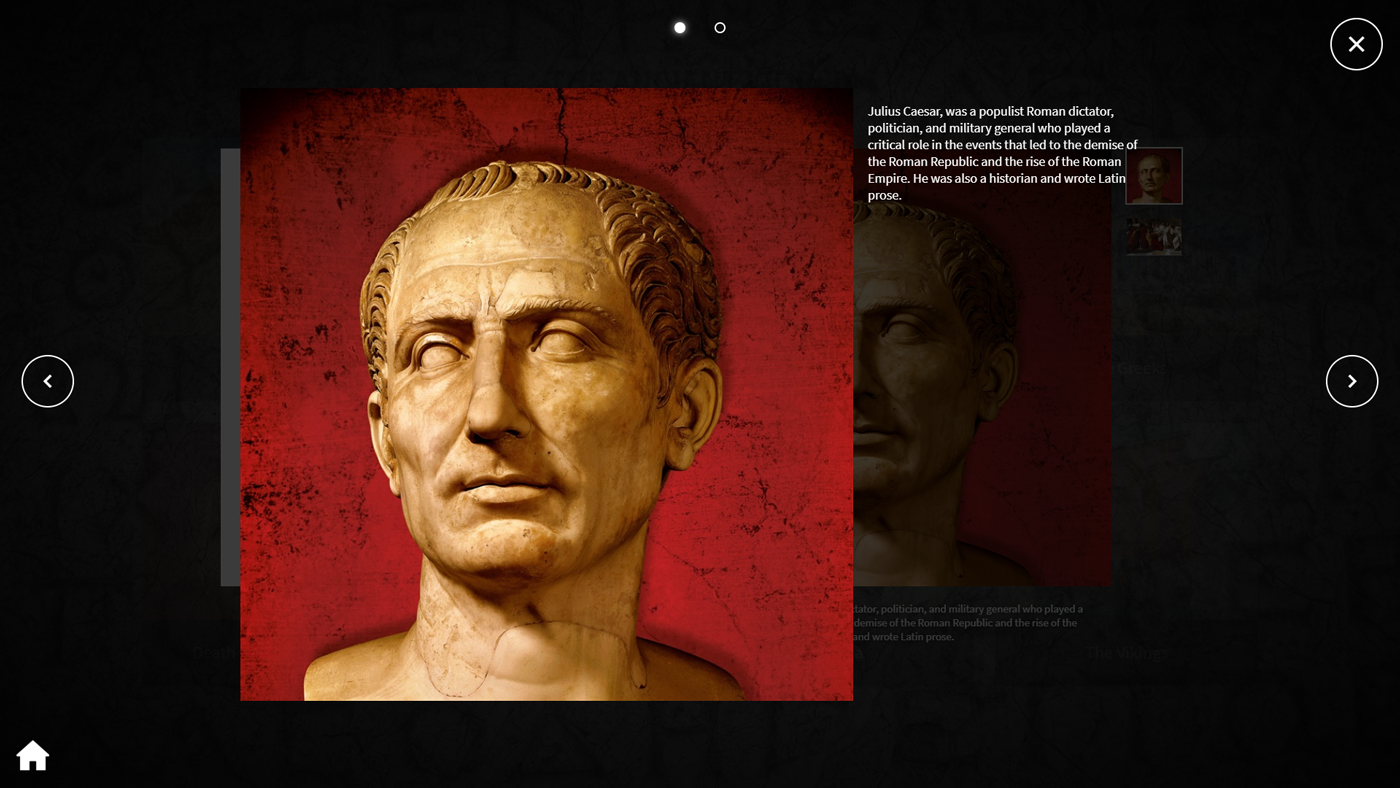
- Image roll - You can see thumbnails of all of the images or media files associated with the article. Each image or media file will be displayed as the current image for a configurable amount of time, as the article cycles through the image roll. If a patron presses on a thumbnail, the image will be displayed as the current image.
- Close - Selecting the "X" icon will close the article, and take the patron back to the presentation.
- Linked articles or presentations - You can see any articles or presentations assocaited to the current article. If the patron presses on the button, they will be taken to the linked article or presentation. If more than one article or presentation is linked to the current article, the button will say "See More" and pressing it will display a list of links.
- E-mail article - The patron can get a copy of the article e-mailed to them by pressing the Email icon and entering their e-mail address.
- Home - Selecting the Home icon will take the patron back to the main screen, where they can pick between the root content of the uniFi+activ.
- Other presentation or widgets in Collection - If the chosen presentation is child of a Collection which has more than one presentation/widget, the patron can select the Ellipsis (...) icon to display a list of the presentations/widgets.
-
4.2
Creating a basic Article
To create a basic Article (Title, Text, Images or Media files with associated text):
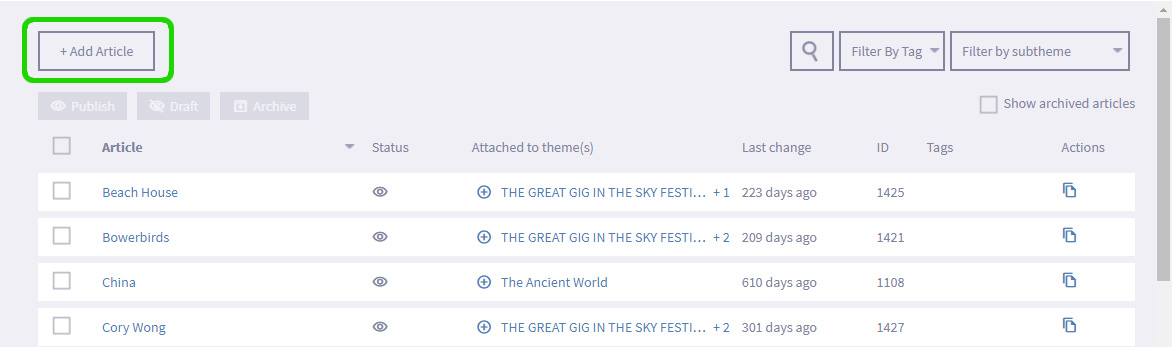
- Select Articles from the options in the main menu.

- Select the + Add Article button, l If the article already exists, select the Article title in the list to go to the edit screen.
- In the Edit article section, select the Content tab and add in the article title and the main article text.
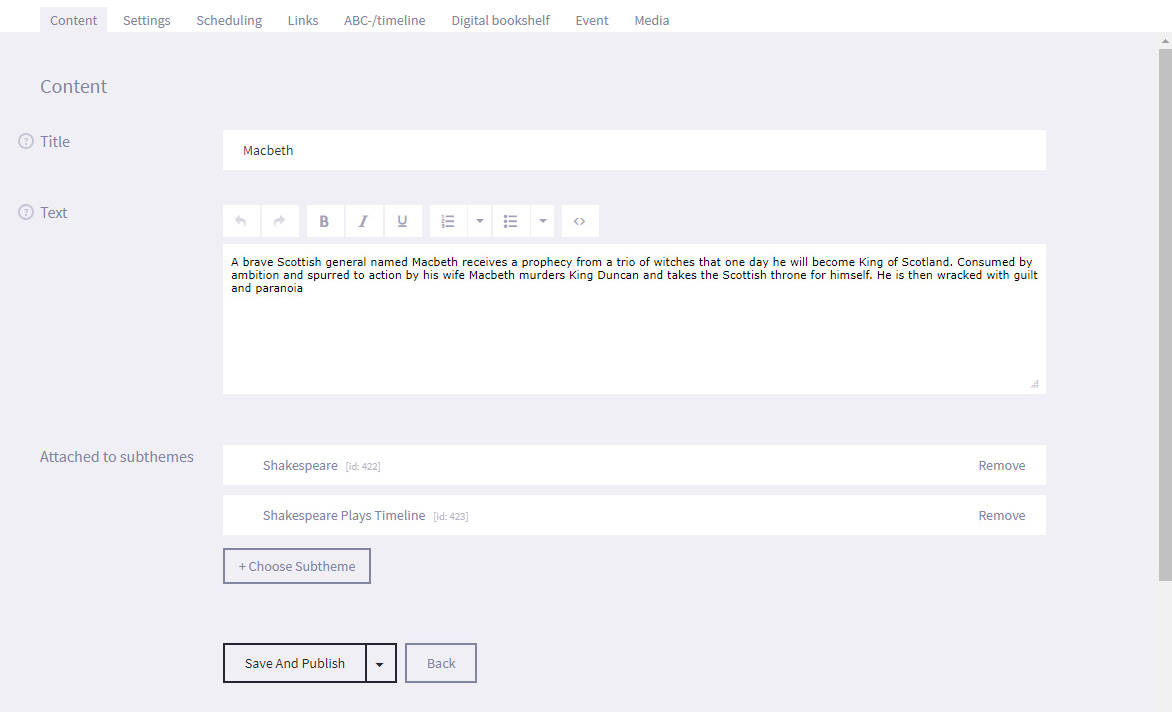
- Select the Save and Publish button at the bottom of the screen. You have created the article and it will now appear under the articles list once you return to it. You can also choose to Save as draft if the article is not ready to publish.
- Select the Media tab and select the + Add Media button.
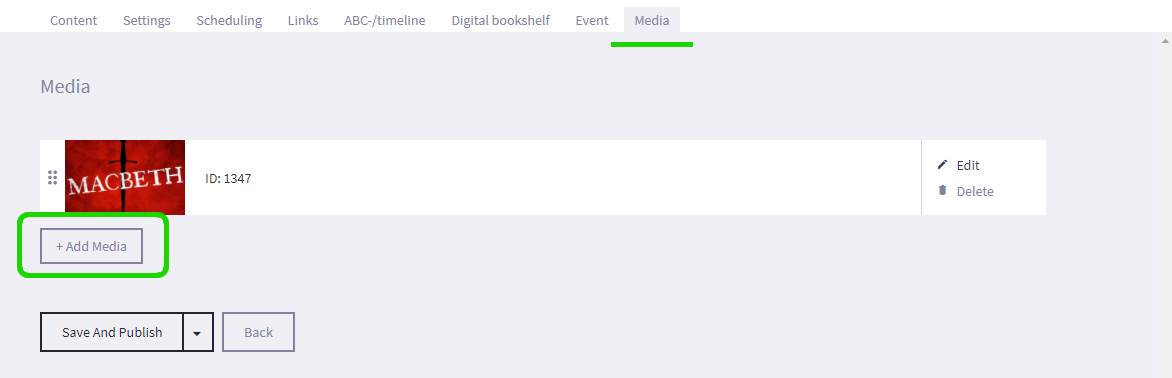
- Navigate to the location of the media file on your computer and select it.
- The media file will now appear on the Media Tab.
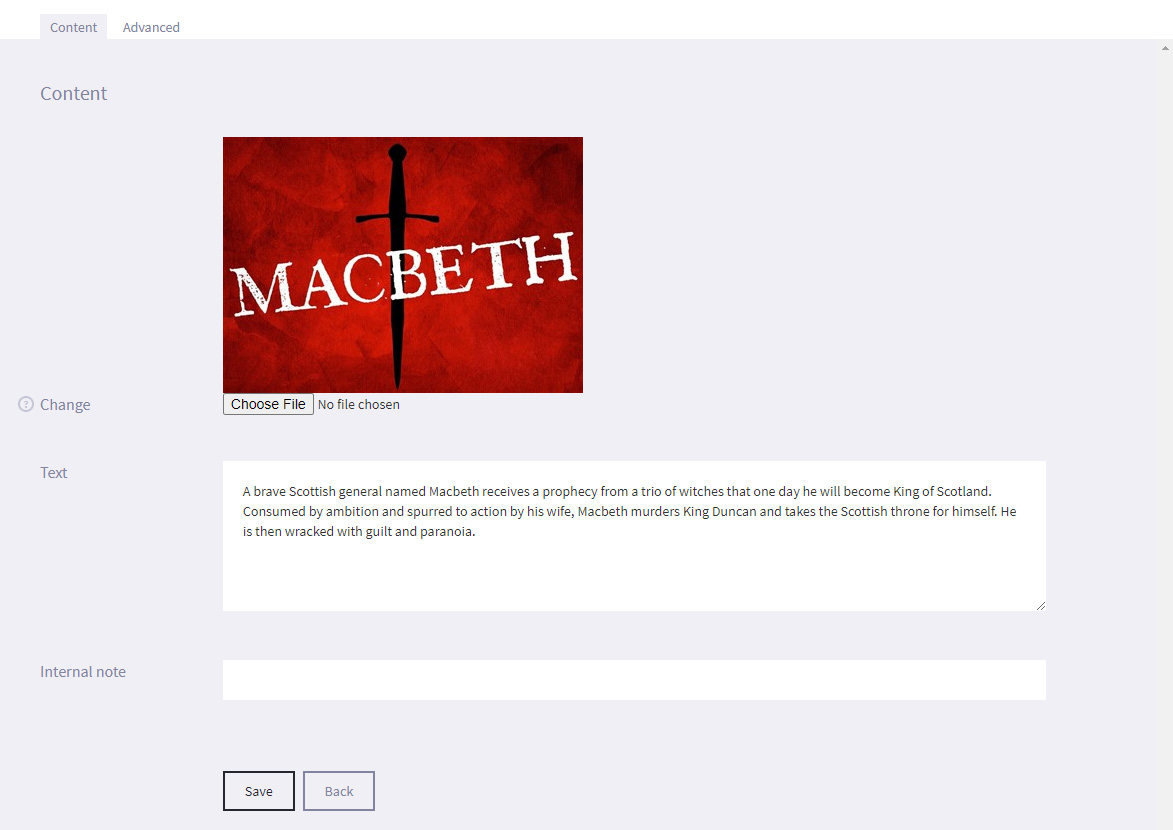
- Select Edit next to the media file. You can change the media file, and add the text that will be displayed with the media file. You should treat the text as a mini-article that gives more specific information about the subject of the image, video or sound file. You can also write an Internal Note such as additional information to research, or the presentations that the article is linked to (and any start and end dates). This text is not seen by patrons.
- Select the Save button at the bottom of the screen
- Select Articles from the options in the main menu.
-
4.3
Specialized Articles
Articles can hold additional properties which allow them to be attached to different presentation types, such as Timelines, Bookshelves and Calendars.
ABC-line and Timeline articles
Basic articles are possible to attach to Timelines and ABC-lines, but for them to be placed correctly the article needs an alphabetic index letter or a timeline start year. These are set under the ABC-/timeline tab.
Article as a library material (book, CD, etc.)
For an article to be a part of a "Digital Bookshelf" presentation it must contain material information. This is added under the Digital bookshelf tab.
Check "Activate material data for the article" and fill out the data including Author and Material Type.Now the article can be attached to presentation of the type Digital Bookshelf.
Article as an event
For an article to be a part of a "Calendar" presentation it must contain event information. This is added under the Event tab.
Check "Activate event data for the article" and fill out the data (Location, Start and End time).Now the article can be attached to presentation of the type Calendar.
One article can contain all types of specialization. Which data is used depends on the current presentation type displaying the article.
-
4.4
Creating a "Poll" Article
Each poll that is included in a 'Poll' article needs to be created in the Polls section and then assigned to it's own article. To create the poll:
- Select Polls from the main menu on the left


- Select + Create New Poll
- Enter the name of the Poll in the Title field. The poll title will be shown as the title of the poll on the +activ screen.
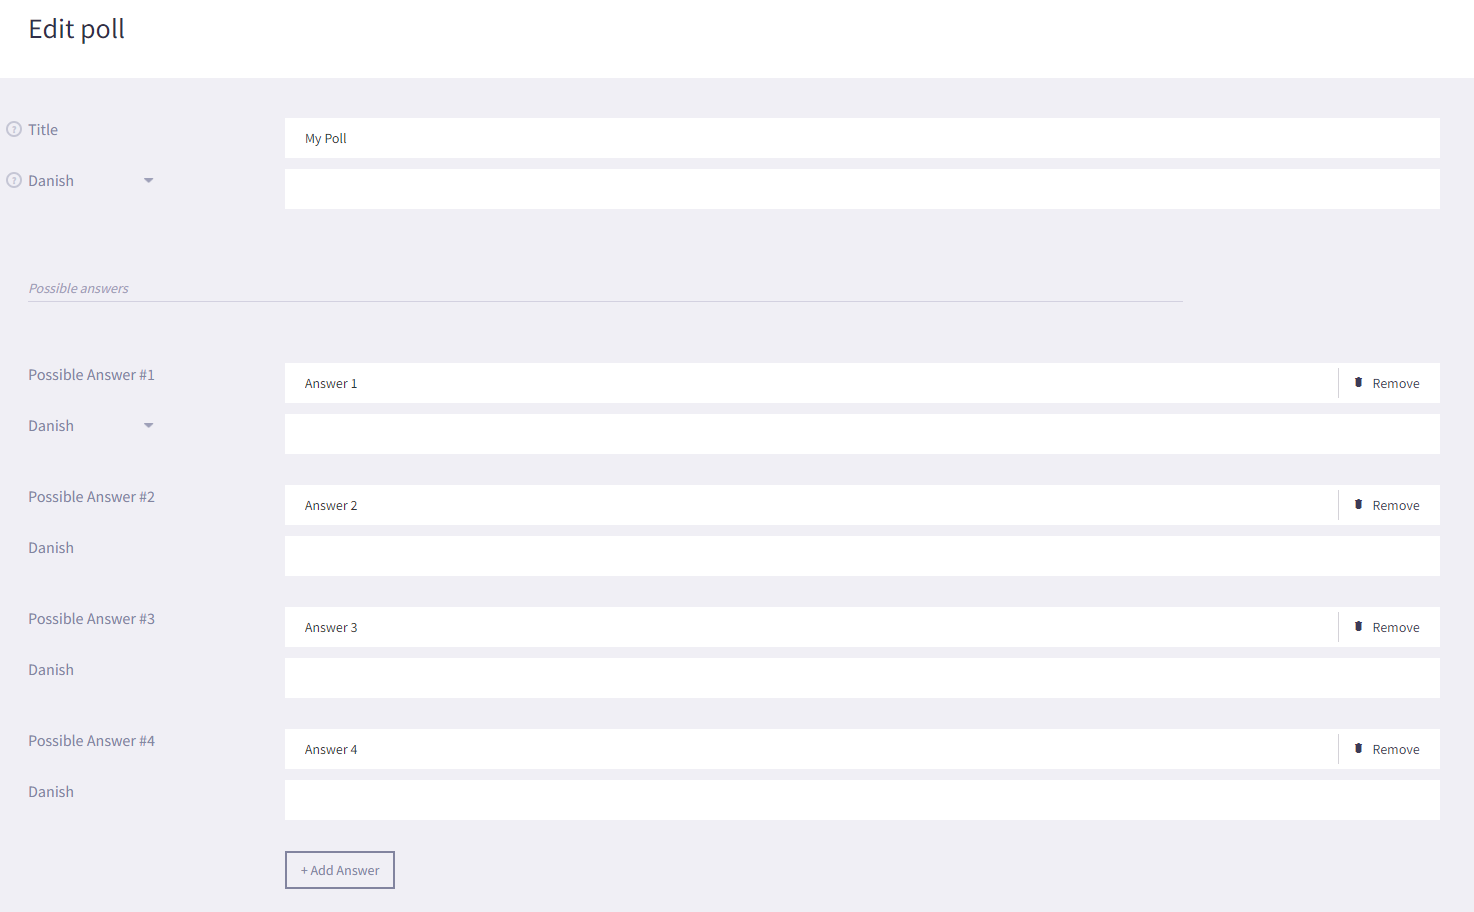
- Select + Add Answer to create a Possible Answer. We recommend creating up to 4 possible answers per poll.
- Enter answers in to the Possible Answer fields.
- Select Save.
To assign the poll to an article:- Select Articles from the options on the Main menu
- Select the + Add Article button
- In the Edit article section, select the Content tab and add in just the article title
- Select Save
- In the Settings section, select the Poll field and use the drop down menu to select the poll you created
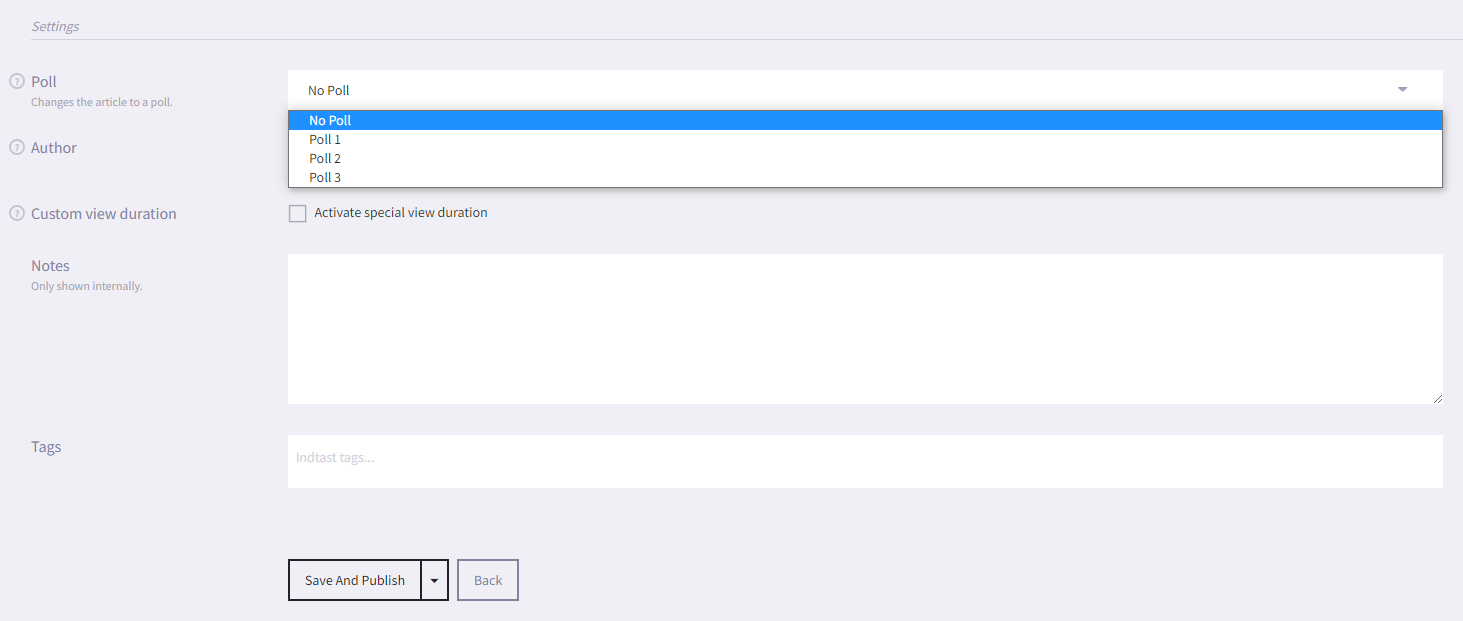
- Select Save
- Select Polls from the main menu on the left
-
4.1