
-
6.
Widgets
A Widget is an independent presentation that does not require articles to be attached. Every Widget type has a specialized purpose.
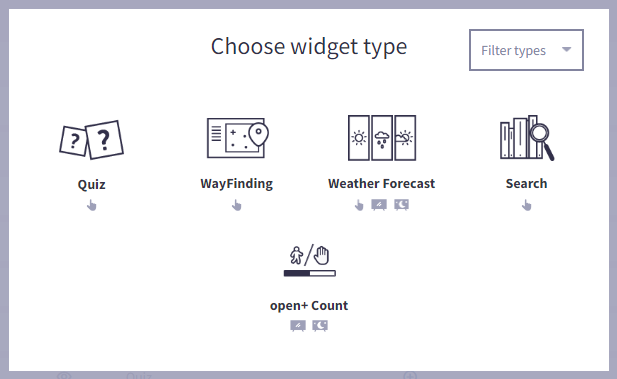
The different Widget types:
- Quiz (uniFi+activ only)
Create and display an engaging quiz for your visitors. - Wayfinding (uniFi+activ only)
Displays a map of the library with searchable icons to help patrons navigate the building. Articles can also be attached to locations. - Weather Forecast
Displays the weather forecast for the next 7 days for a configurable location. Works equally on display, idle and activ. - Search(BETA) (uniFi+activ only)
Allow patrons to use keywords or phrases to search through a third party application (such as an LMS / ILS) and display the results on screen, including any additional information on the item held on the application. Integration is only available for select third party applications and all configuration and association to the library account must be completed by bibliotheca. - open+ Count
An add-on to the Bibliotheca open+. Monitoring the capacity vs current occupancy of the public space.
-
6.1
Weather Forecast
The Weather Forecast widget is used to display the weather forecast for the next 5 days for a configured location.
The widget will display the temperature, wind speed and rain fall, in addition to a pictoral image of the weather (Sunny, Cloudy, Snowing, Raining, Stormy etc.).
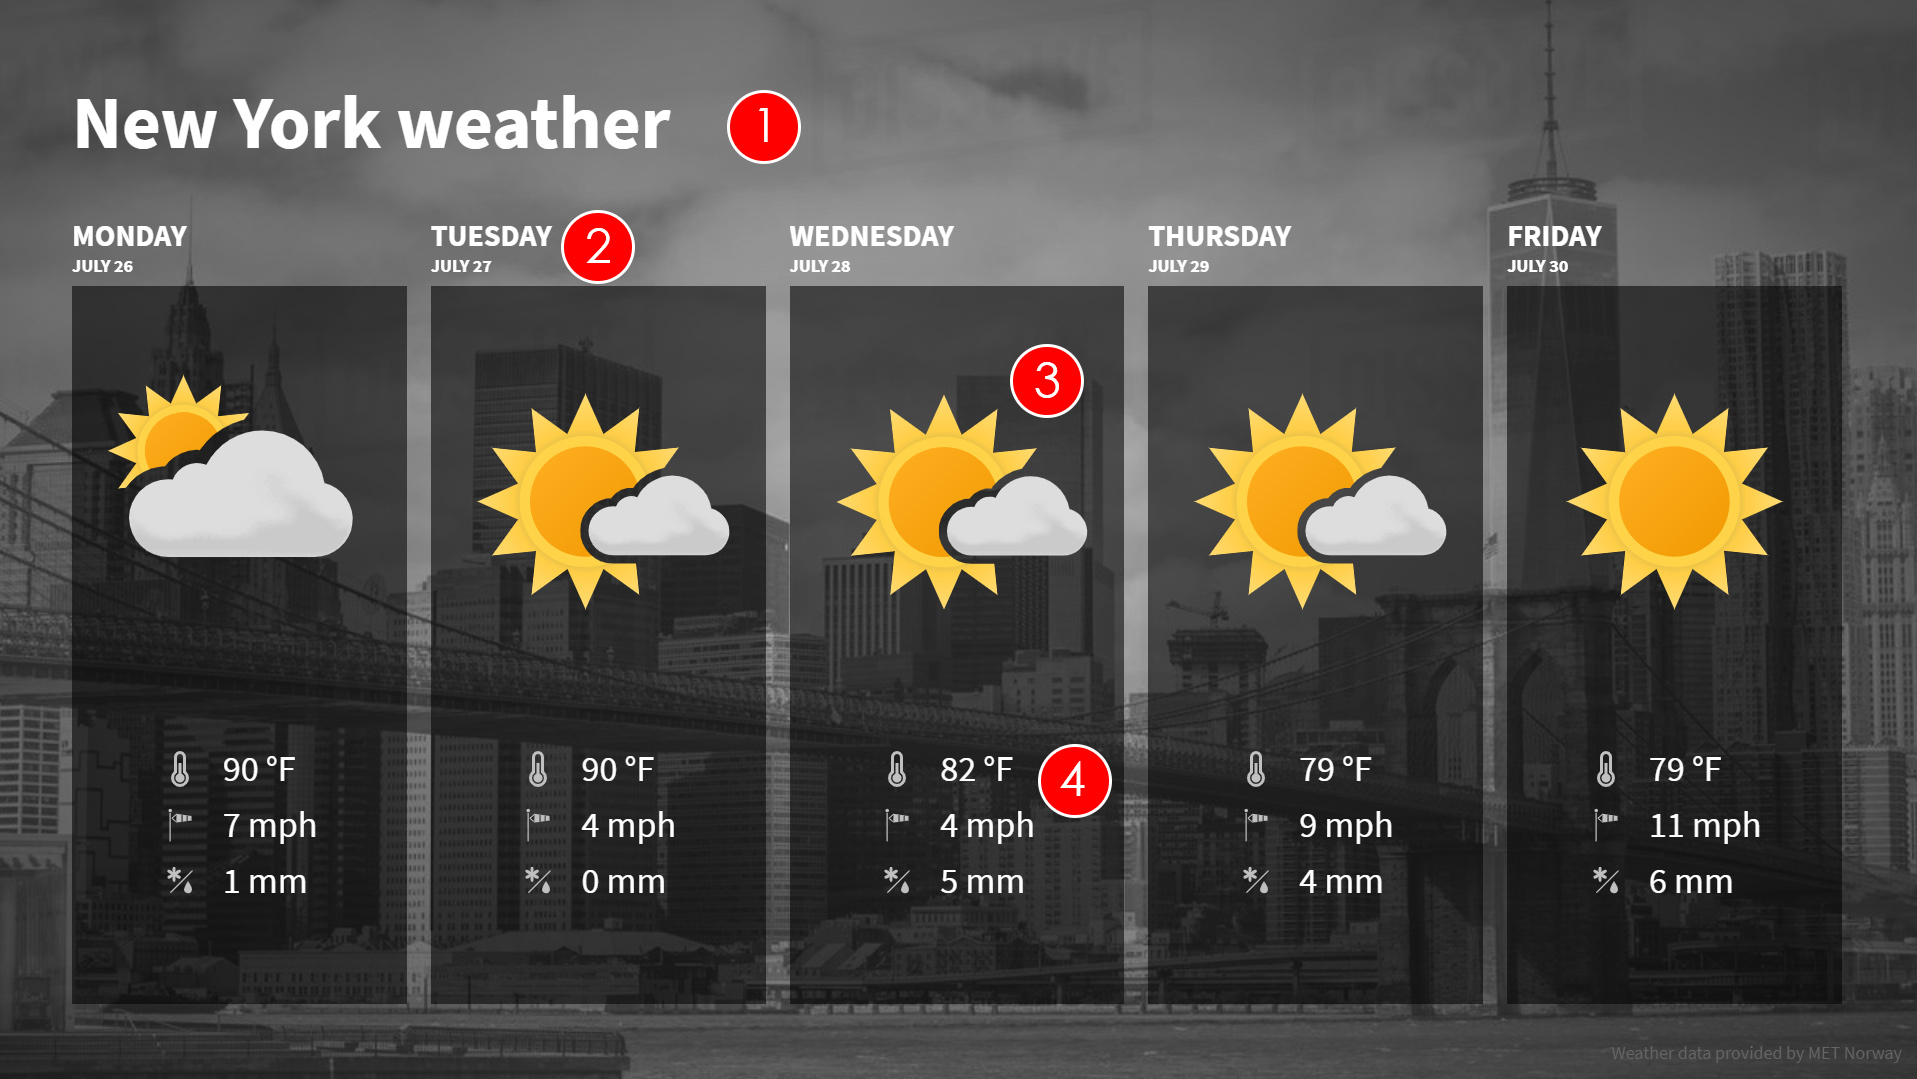
- Title of weather forecast - A good practice is writing the location that the weather refers to.
- Date - This is the date that the forecast is for
- Weather Symbol - This is a visual representation of the general weather forecast for the specified day. For example, a picture of a white cloud with the sun appearing above it would generally point to a sunny day with some cloud.
- Weather specifications:
Temperature - This is the average temperature forecasted for the day (in Celsius or Fahrenheit).
Wind speed - This is the wind speed forecasted for the day (in metres per second or mph).
Percipitation - This is the overall amount of percipitation (Rain, Snow, Sleet or Hail) forecasted for the day (in millimetres or inches).
-
6.1.1
Creating a Weather Forecast
To create a Weather Forecast widget:
- Select Widgets from the options on the Main screen.

- Select + Add Widget and choose the Weather Forecast.
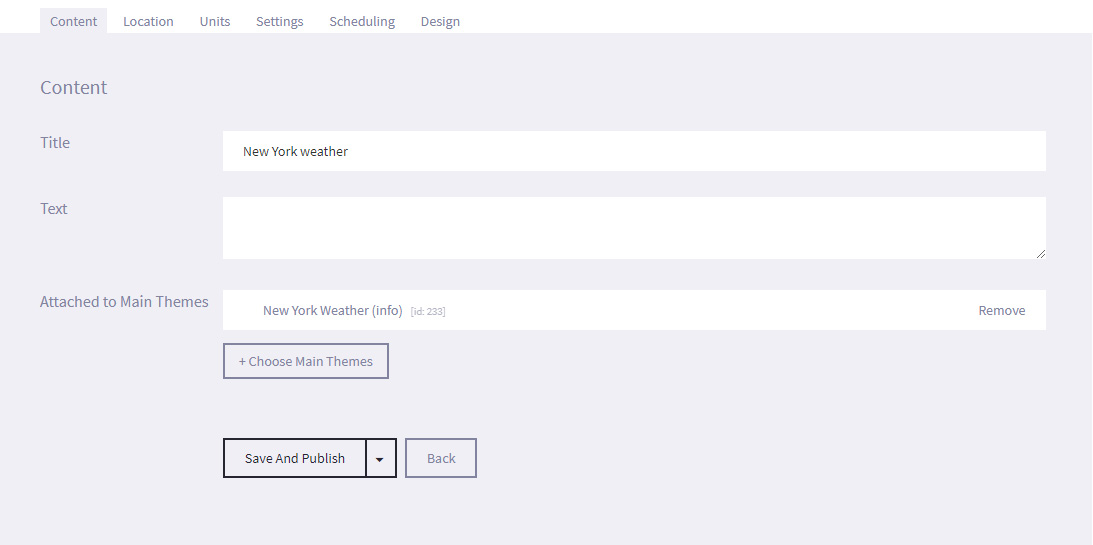
- Under the Content tab, enter the Title and Text.
- Under the Location tab, enter the City name and Country of the location that you want a forecast for.
Select Find Current Location if you want the forecast for the location you are currently in, or Find Coordinates if you want the forecast for the location that you have entered in the City name field.
Selecting either will display a map in the Location Chosen field, with a pin drop marker specifying the exact location. If you know the exact coordinates, you can manually enter the Longitude and Latitude.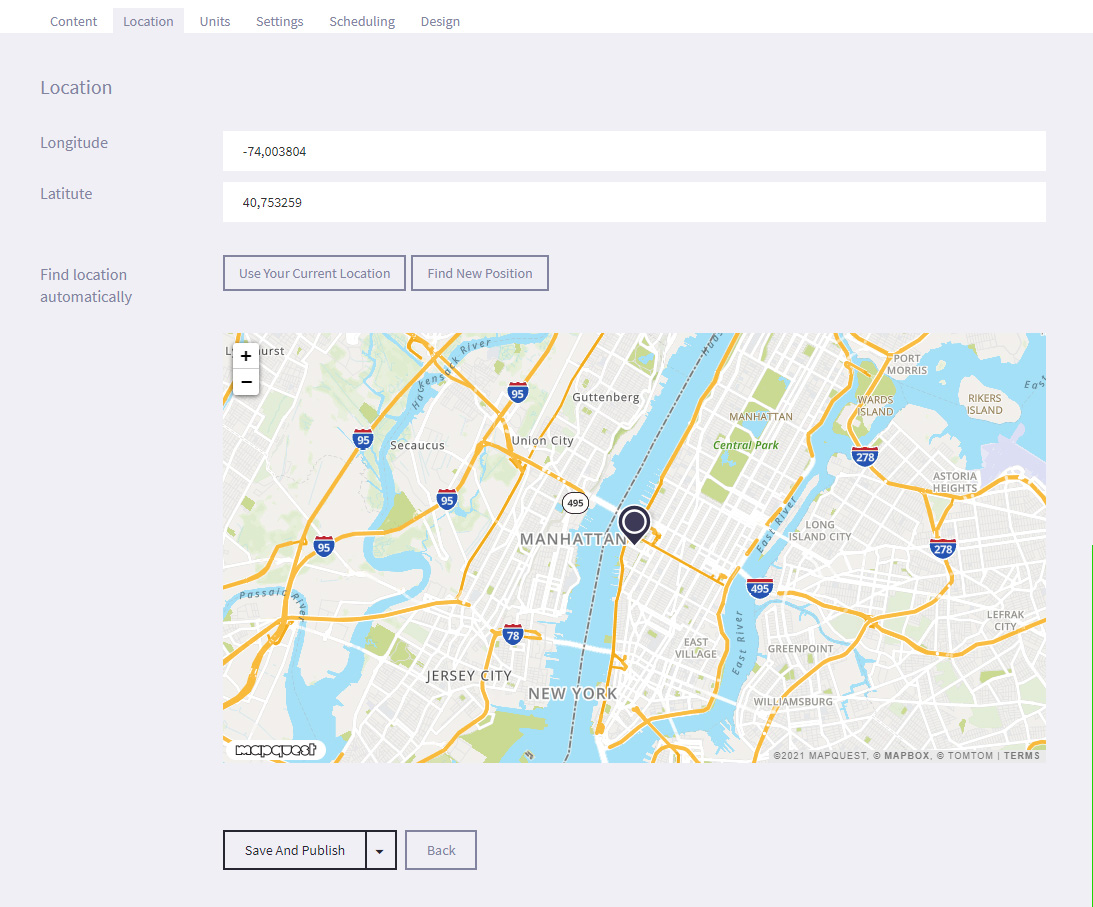
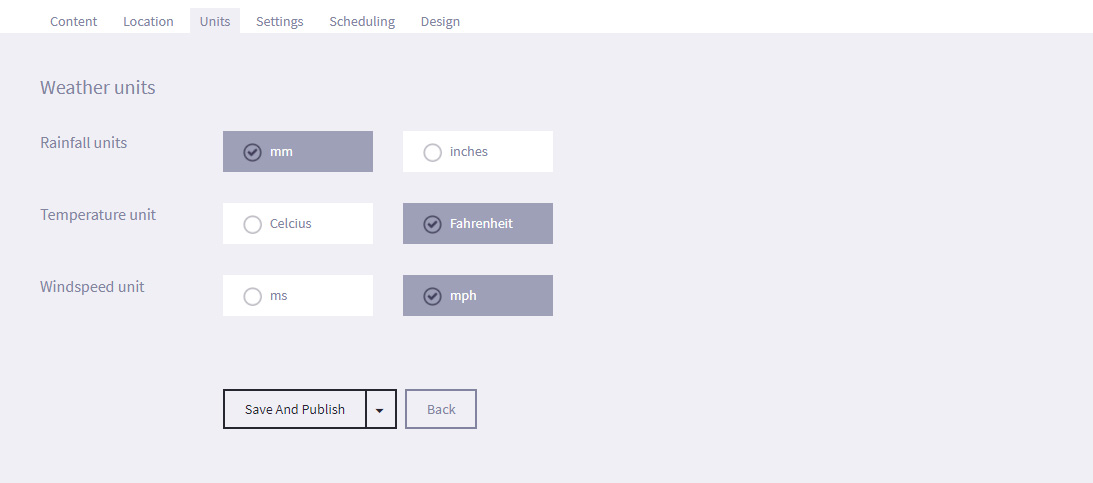
- The unit tab lets you decide what units you want your weather specifications displayed in.
- Under the Settings tab, you can set a time limit for the specific dates and times that the widget will be displayed by selecting Active time limit and entering the required Start and End dates and times.
- Additionally, you can assign tags to widget so that it is easier to search for later. For example, if the widget is part of your Roman collection, you can enter a tag such as Rome on all articles, presentations and widgets that should be included.
- Under the Design tab, select Choose File and navigate to the location of the image to use as a background image. l We recommend a resolution of 1920 x 1080 pixel for applications in landscape view.
- Select Save and Publish (or Save as draft if not ready to publish).
- Select Widgets from the options on the Main screen.
-
6.2
Wayfinding
(+activ only)
The wayfinding widget is used to help patrons navigate the library, showing the location of facilities and materials. Articles can also be attached to give more information, and can include images of the location.
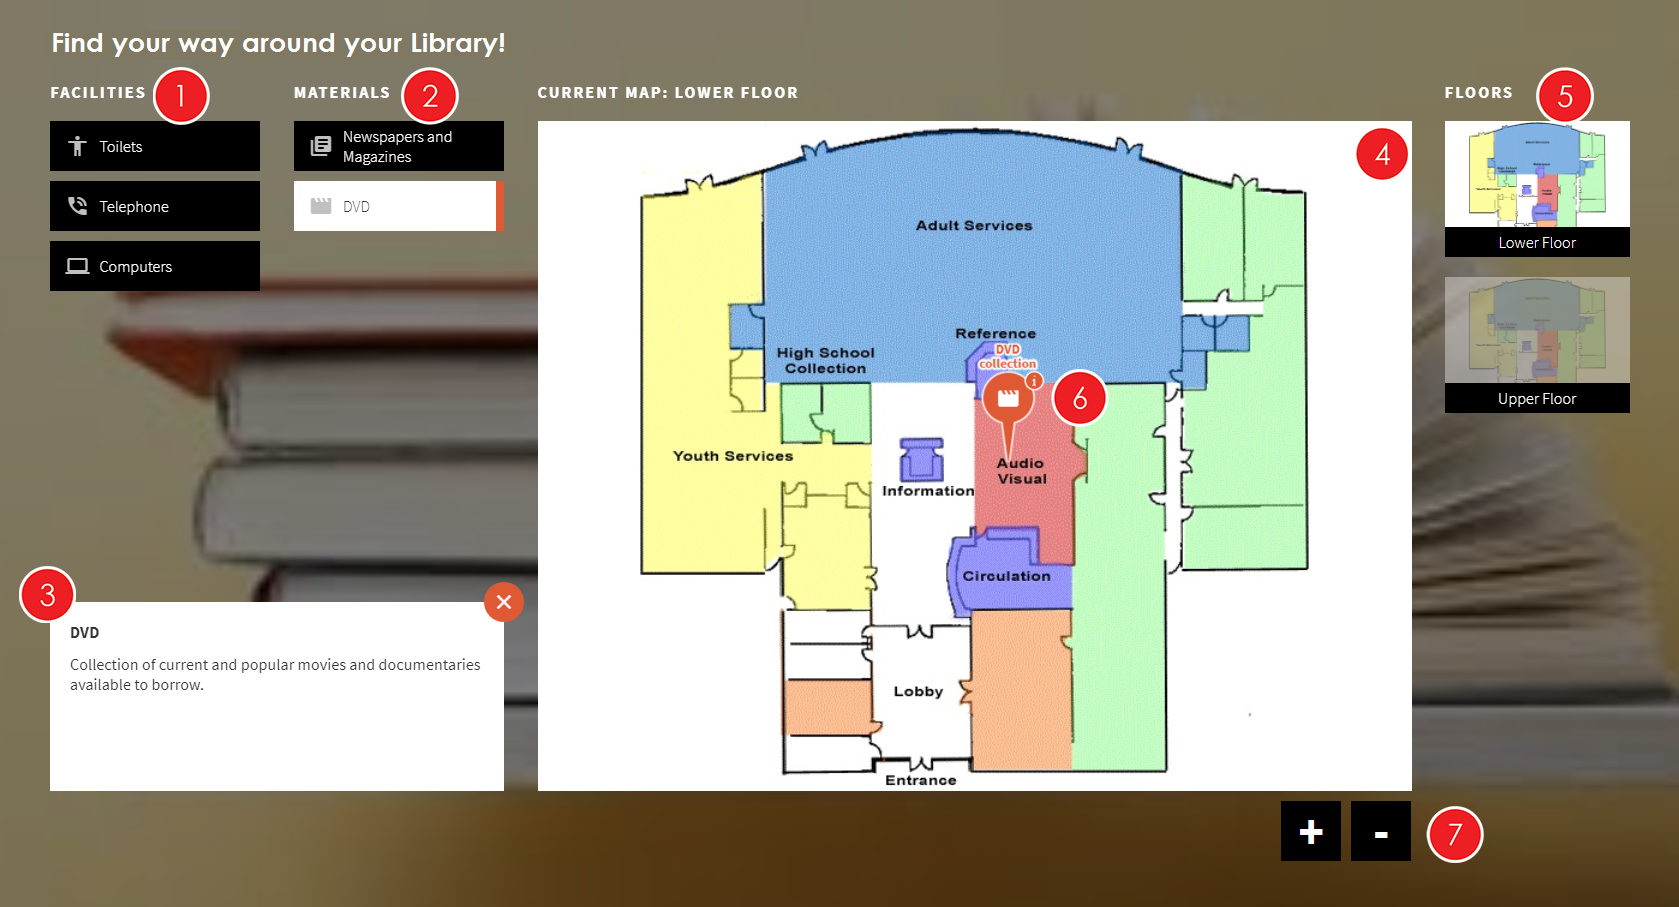
- Facilities list - A list of the Facilities in the library (Toilets, Telephones, Computers etc.). Tags are set up in the Wayfinding section.
- Materials list - A list of the Materials in the library (Newspapers and Magazines, DVDs, Periodicals and Journals etc.). Tags are set up in the Wayfinding section.
- Tag Description - A brief description of the selected tag. For example, you may want to let patrons know that there is a set fee for borrowing DVDs and CDs.
- Current Map - This is the current map that the patron can interact with. The title above (i.e. Lower Floor) is configurable, and should inform the patron of the location.
- Floors - If more than one map has been created in Wayfinding, all the maps will be shown in a list of smaller images by the side of the Current map. The current map will be highlighted in the list, with the other maps appearing slightly transparent. To view a map, the patron just needs to select one of the transparent maps. The selected map will then become the current map.
- Tag location - A pin will indicate any locations on the current map that have been tagged as having the selected facilities or materials. If the pin also has an "i" on it, it has an associated article that can be viewed by pressing the pin.
- Zoom - Patrons can use the "+" and "-" buttons to zoom in and out of the image.
-
6.2.1
Creating Wayfinding maps
To create the wayfinding maps:
- Select Wayfinding in the main menu

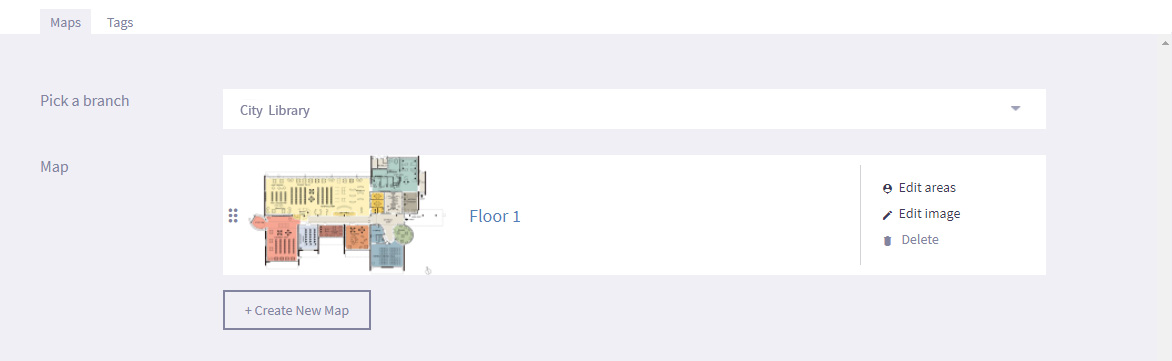
- Under the Maps tab, select + Create New Map
- Select Choose File and browse to the location on your computer that stores the map image that you wish to use.
- Enter the title for the map in the Title field. This should be the location (such as Lower Floor or Upper Floor), as this text is displayed on screen.
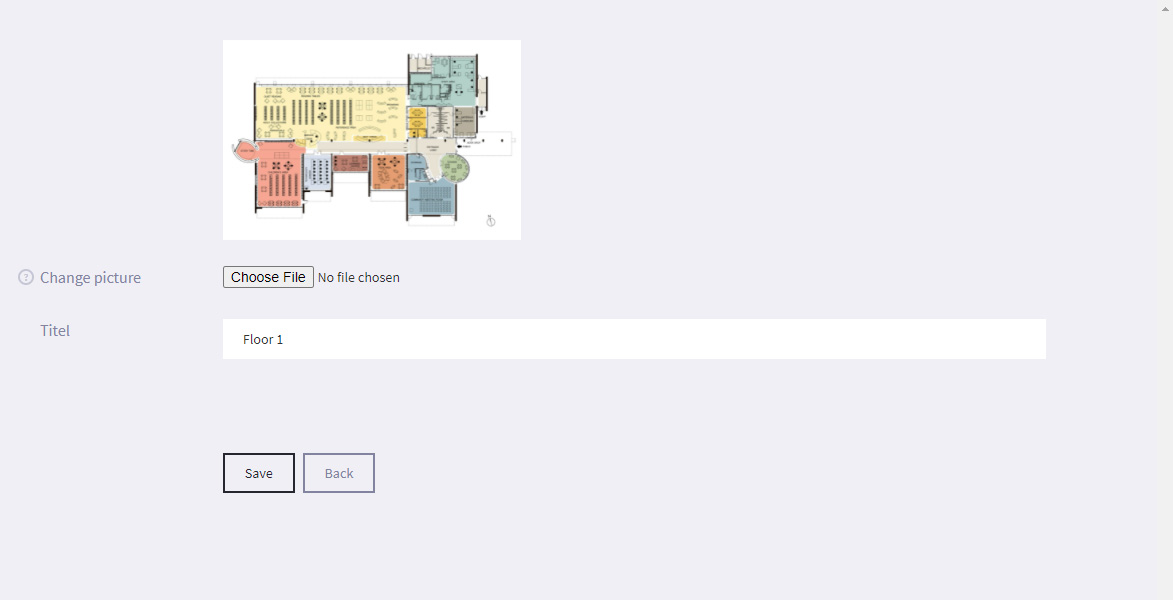
- Select Save
- Under the Tags tab, select + Create New Tag
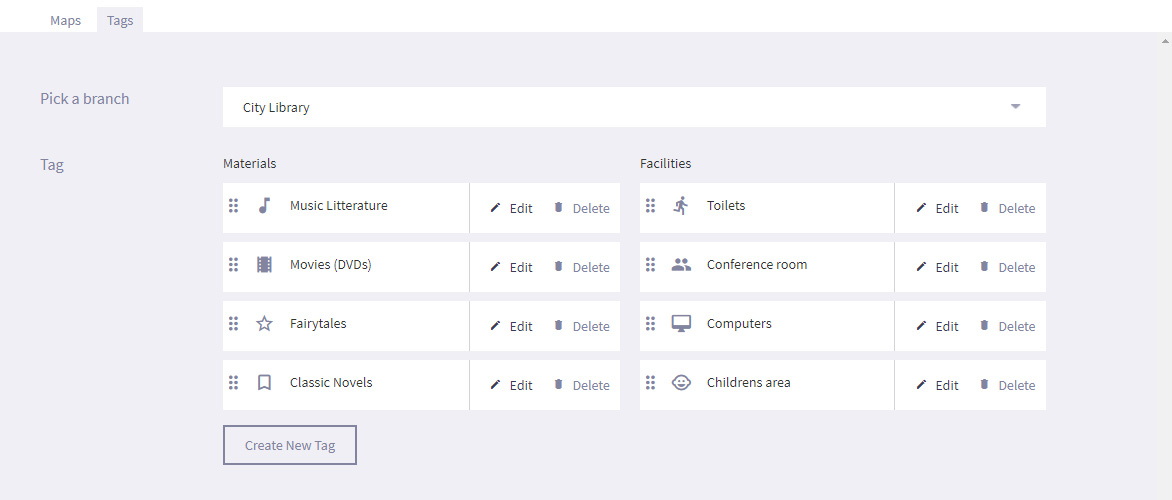
- Enter the Title for the tag (e.g. Telephones) and the Tag Description.
- Select the Tag type from the Categories drop down menu (Facilities or Materials).
- Select Add Icon and choose a relevant icon from the available icon to be displayed on the pin.
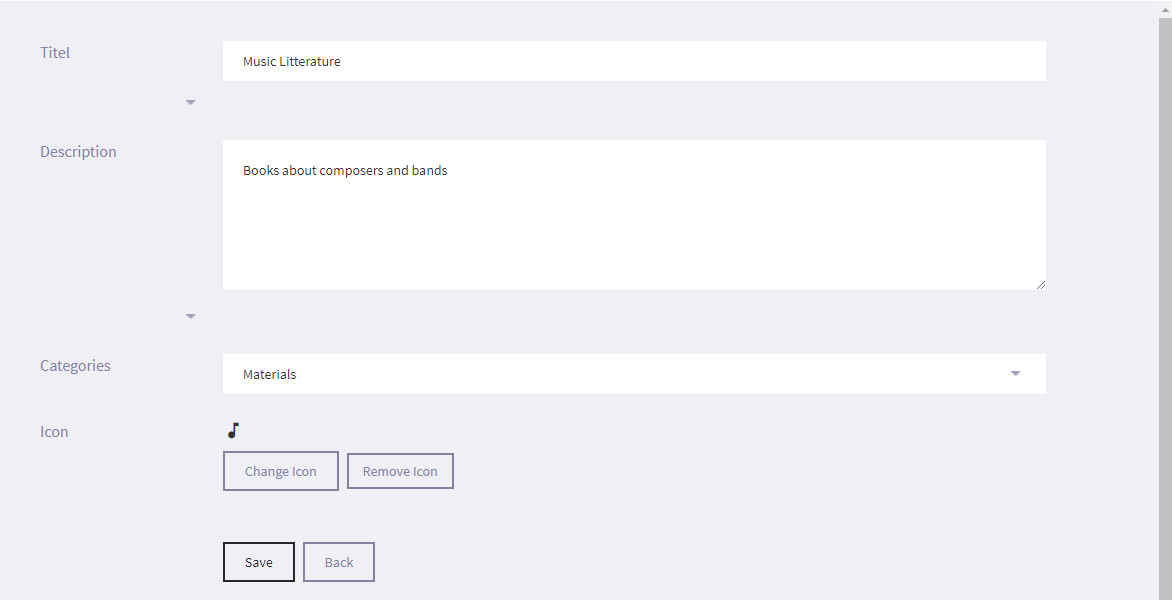
- Select Save
- Return to the Maps tab and select Edit areas next to the map that you want to edit.
- Select Draw area, Draw rectangle or Insert point and specify the areas on the map that you want to add tags to.
- Select Insert screen to specify the location of the uniFi+activ screen. - Enter the Title for the area (e.g. History section, DVD collection).
- Use the Tags drop down menu to select any tags that you want to assign to the area.
- If required, select Add Article and assign an article that can be viewed by the patron when they touch the tag pin.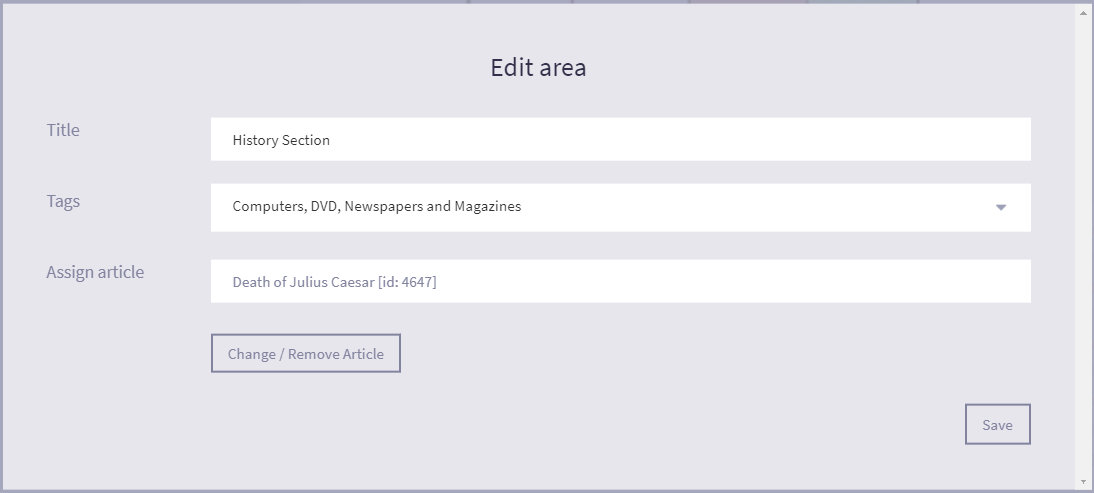
- Select Save on both the Edit Area and Wayfinding screens.
- Select Wayfinding in the main menu
-
6.2.2
Creating a "Wayfinding" widget
To create a Wayfinding widget:
- Select Widgets from the options on the Main screen.
- Select + Add Widget and choose the Wayfinding widget
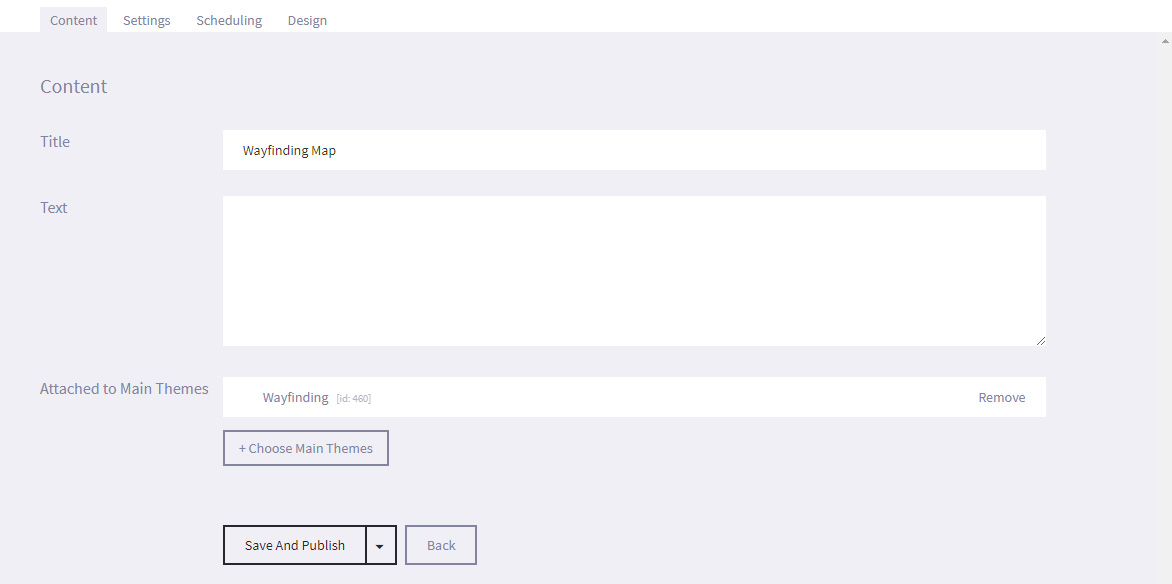
- Under the Content tab, enter the Title of the widget and Text. These are not displayed on screen.
- Under the Settings tab, you can assign tags to widget so that it is easier to search for later. For example, if the widget is part of your Roman collection, you can enter a tag such as Rome on all articles, presentations and widgets that should be included, or you could also enter a tag such as Julius Caesar so that you can quickly search for a specific subject. You can add multiple tags to a widget, presentation or article.
- Under the Scheduling tab, you can set a time limit for the specific dates and times that the widget will be displayed by selecting Active time limit and entering the required Start and End dates and times.
- Select Save. You do not need to link any articles to the widget. It automatically uses all of the maps set up in the Wayfinding section.
- Select Widgets from the options on the Main screen.
-
6.3
Search (BETA)
(+activ and Danish customers only)
The Search widget allows a patron to search an entire LMS / ILS database (which can only be associated to your account by bibliotheca) for results, and is similar to the Digital Bookshelf presentation except that it does not limit the results to subjects set by the library.
-
6.3.1
Creating a Search widget
Although you can create a Search widget, the third party application (LMS / ILS) can only be associated to your account by bibliotheca.
If it is not, no results will be displayed on screen and you will see an error message.To create a Search widget:
- Select Widgets from the options on the Main screen.
- Select + Add Widget and choose Search.
- You will see the Edit screen. Under the Content tab, enter the Title (which will be displayed on screen) and optional Text (which is not displayed on screen).
- Select Save and Publish (or Save as draft if not ready to publish).
- Attach the widget to a Screen (or a Collection and make sure that Collection is enabled on the required screen or screens).
- Select Widgets from the options on the Main screen.
-
6.3.2
Using the Search widget on screen
To use the Search widget:
- Press the Main Menu tile that the Search widget is associated to on the screen.
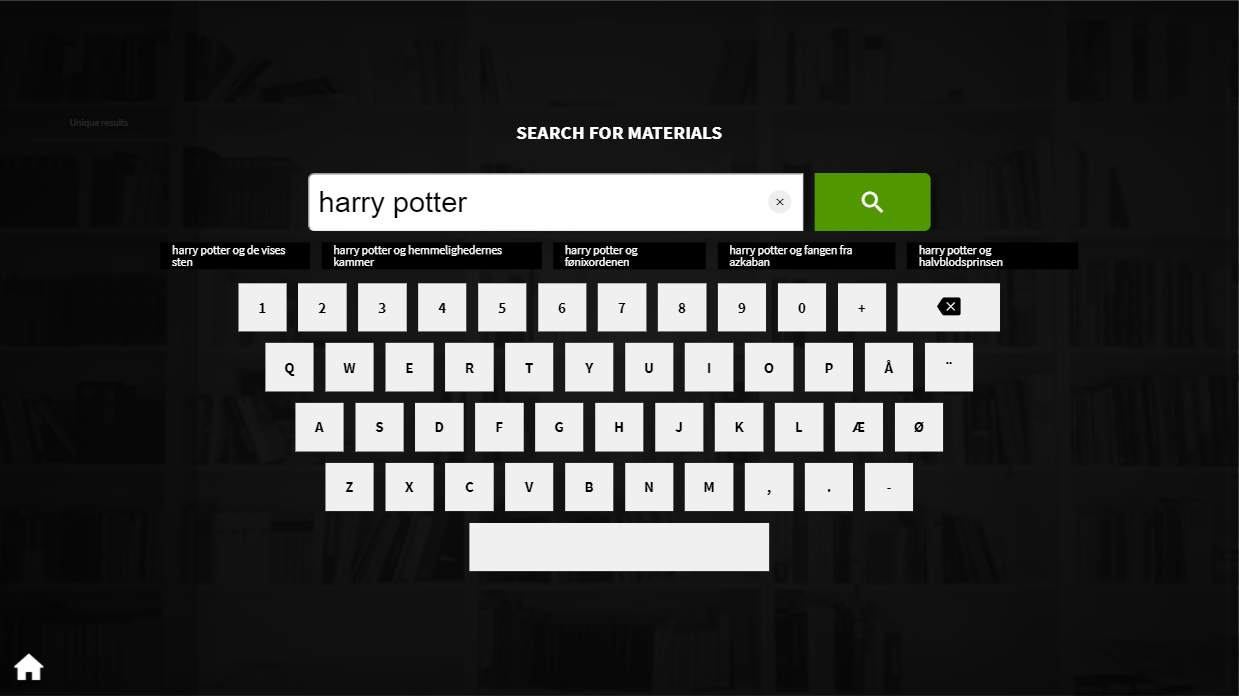
- Use the onscreen keyboard to enter a keyword or phrase that you would like to use to filter the results from the LMS / ILS (for example, a subject - Ancient Rome, an author - J.K.Rowling, or a title - Game of Thrones) in to the Search bar.
- As you enter the keyword or phrase, you will see search suggestions displayed under the Search bar. For example, if you enter the keywords "Harry Potter" in to the Search bar, you will see the titles of the Harry Potter books displayed as search options. Pressing one of these options will take you to the results for that specific keyword or phrase.
- Press on the Magnifying Glass icon to search for results based on the keyword or phrase entered in the Search bar.
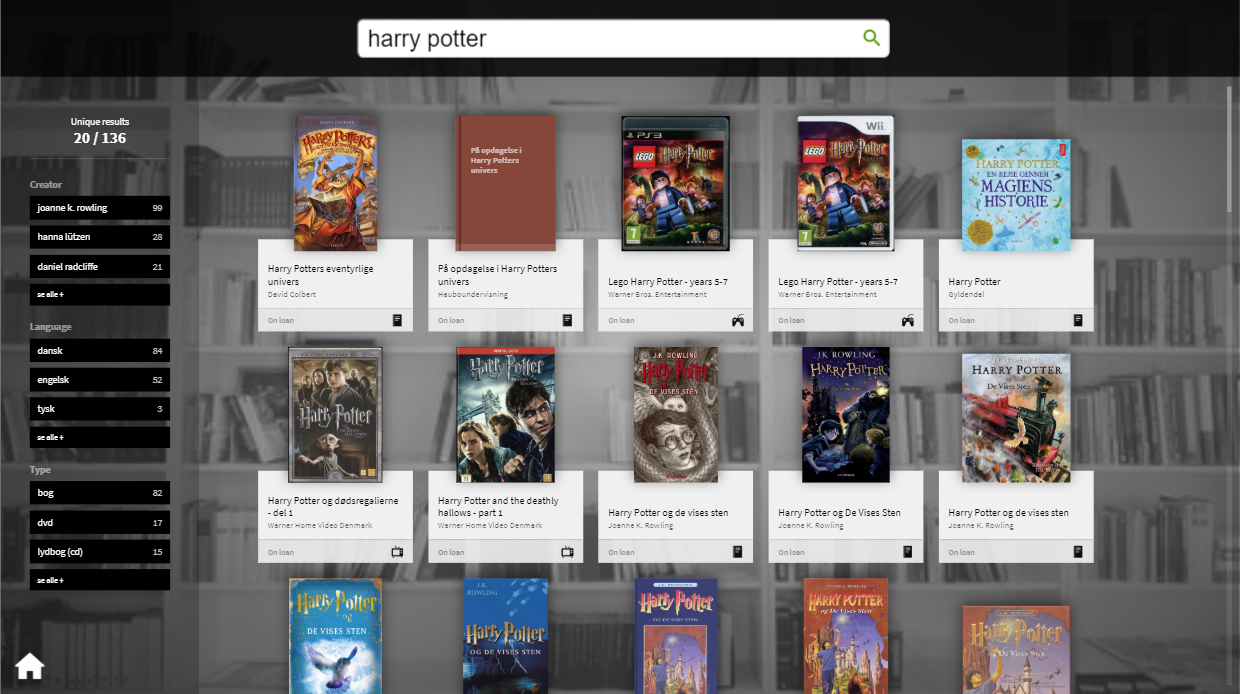
- The next screen will display all the results that the LMS / ILS can find relating to your keyword or phrase, using the cover art as a tile, if available.
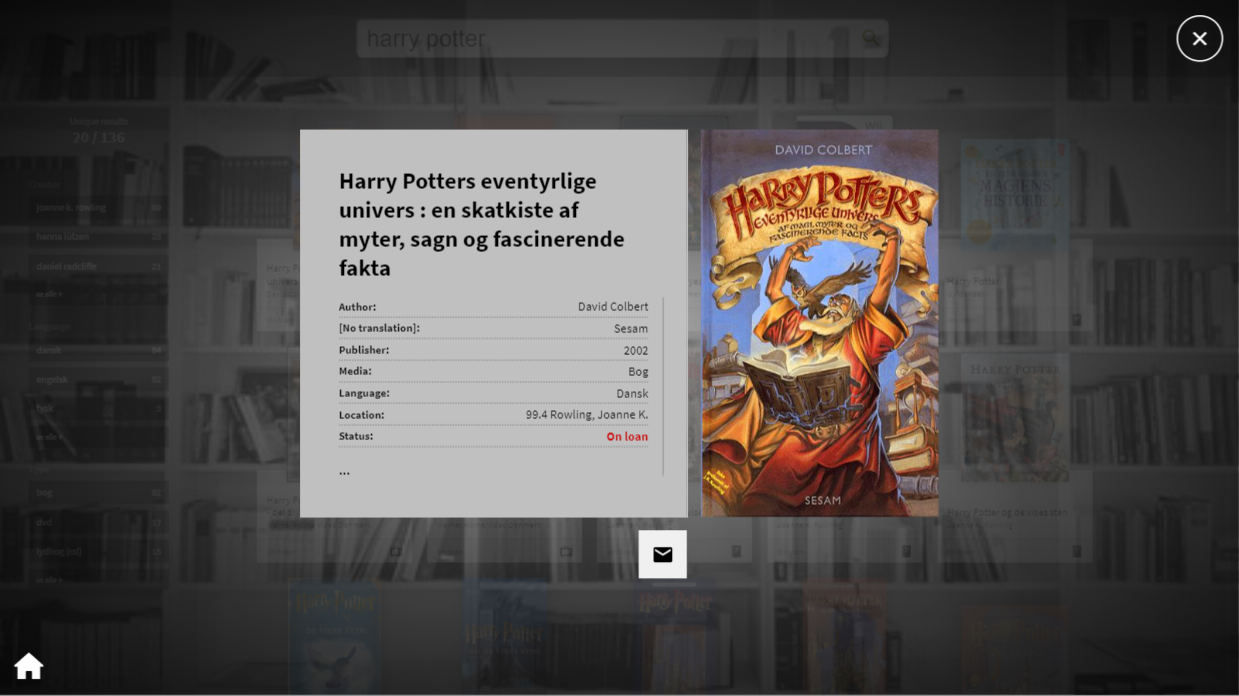
- Press on the cover art of a title to see the information that the LMS / ILS has for that title (such as author, publisher, library location and current circulation status etc.)
- Select the Cross icon in the top right corner of the screen to return to the results page.
- Select the Envelope icon to send the information to an e-mail address of your choosing, which you will be required to enter using an onscreen keyboard.
- You can use the additional filter options in the column to the left of the screen to further filter the results by Author (or key person), Language and / or Media Type. Selected filters will be highlighted in white. In the example below, you will see that the results have been filtered to only show English language DVDs that relate to J.K. Rowling.

-
6.3.1
-
6.4
Quiz
(+activs only)
A quiz is a widget which can engage users at your library. Below is an illustration and explanation of how a quiz is presented on the +activ. Afterwards a detailed guide on how to create a quiz is presented.
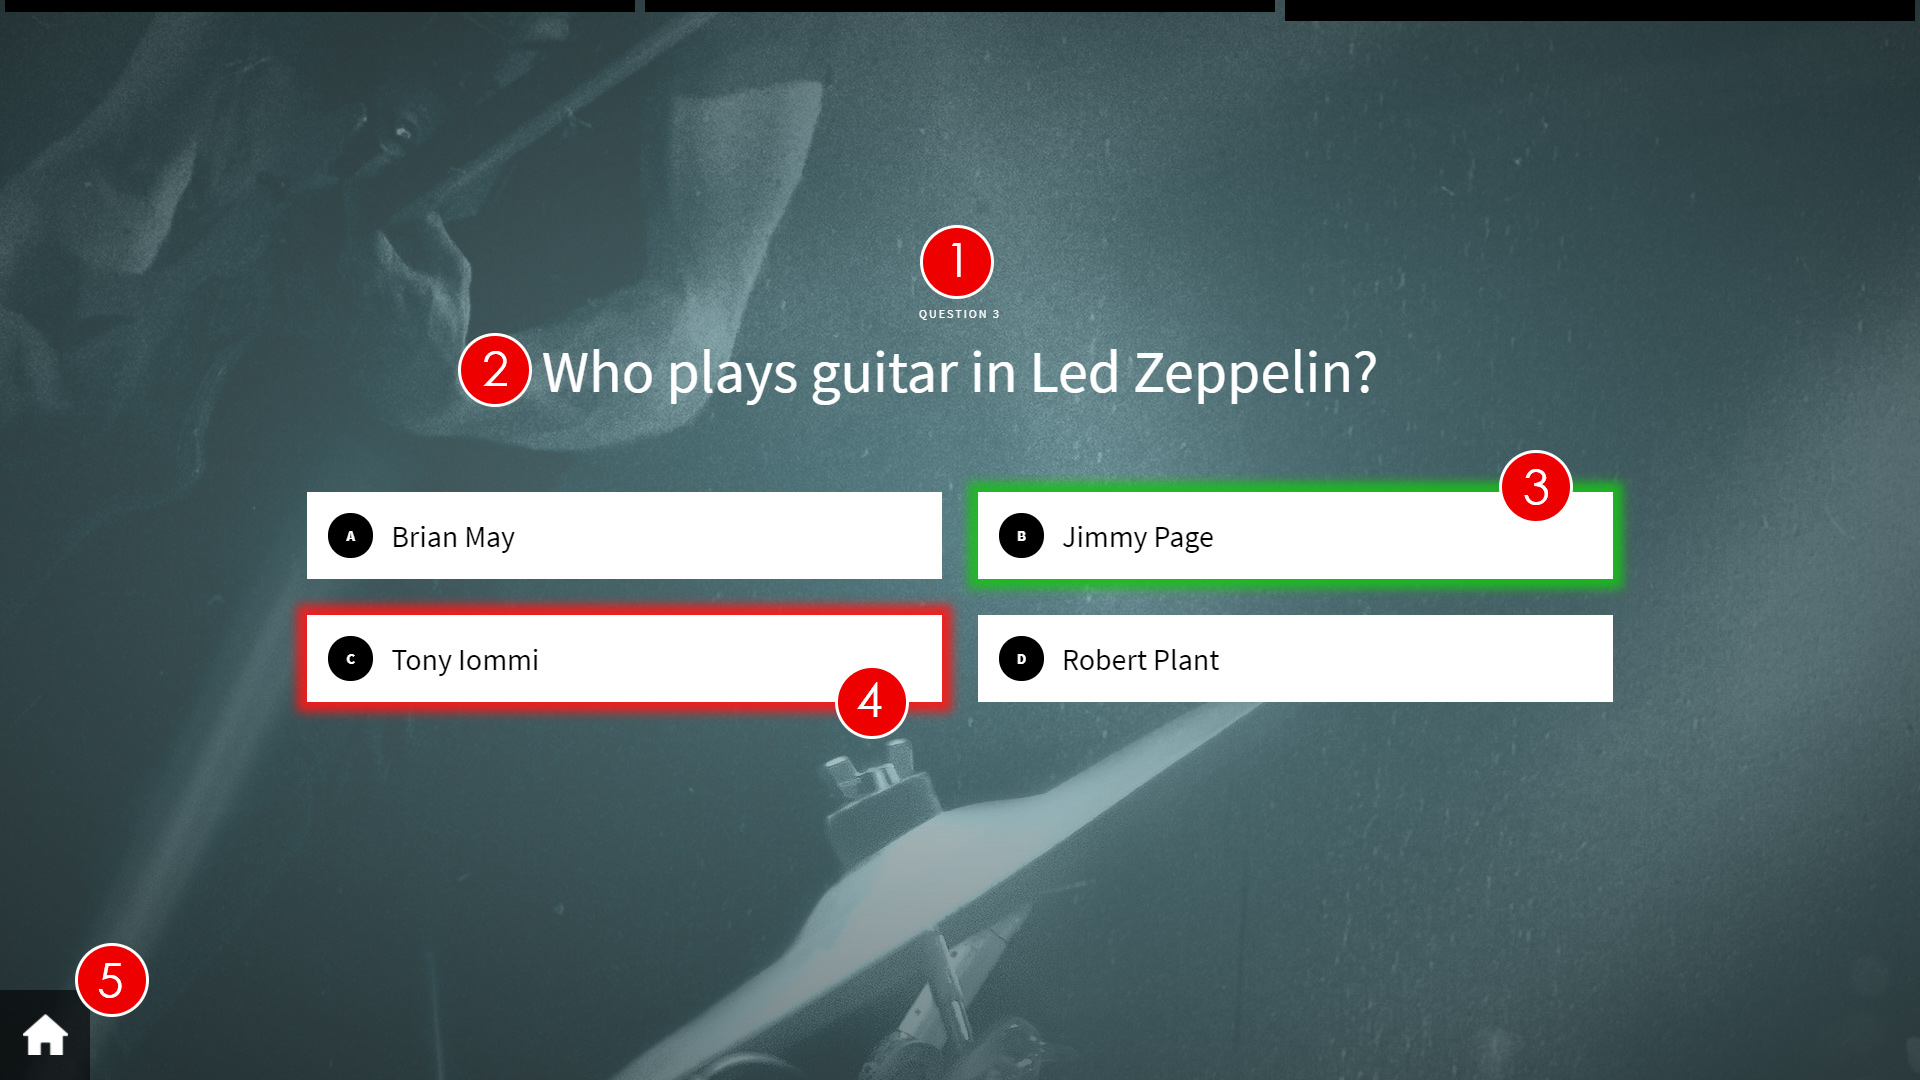
- Question number - Shows the current question number in the quiz.
- Question - This is the question that is being asked.
- Correct answer - The correct answer will be highlighted green whether the patron selects it or not. The highlighting of answers occurs after the patron chooses their answer.
- Selected incorrect answer - If the patron chooses an incorrect answer, the selected answer will be displayed highlighted red.
- Home - Selecting the Home icon will take the patron back to the main screen, where they can pick between the root content items of the uniFi+activ.
You can also add a background to the quiz. The background is the same for all questions, and you should also consider whether the colours of the background will contrast, obscure or take focus from the question text.
-
6.4.1
Creating a Quiz
To create a Quiz widget:
- Select Widgets from the options on the Main screen.
- Select + Add Widget and choose Quiz.
- Under the Content tab, enter the Title for your Quiz. This is used to name your Quiz in the administration and will not be shown on the screen.
- Select the +activ the Quiz will be shown on. This can always be done later in the process.
- Select Save as draft
- Go to the Question tab, start by clicking + Create New Question
- You will be redirected to the 'Edit question' page. To create a question for your Quiz you will need to:
- Write your Question. This is the title of your question which will be shown on the screen. For multi language support translate the question to your desired languages.
- Select + Add Answer to add answers to your question. We recommend creating up to 4 possible answers per question. For multi language support translate the answer to your desired languages.
- Select the 'Correct answer' from the drop-down list. You should try and make sure that the correct answer is not in the same position for each question (e.g. the correct answer is not always Possible Answer #1).
- Click on Save to save your question, then click on Back to start adding more questions to your Quiz

- Saved questions will be shown in a list under the Questions tab. From the list view you can:
- Click on the question title or the edit button to go to the edit page of the specific question.
- Click delete to delete a question in the quiz.
- Change the order of the questions shown in the quiz on +activ by dragging and dropping the list items to the desired position. The top question in the list is the first question shown on the +activ and so forth. Remember to click Save as draft or Save and Publish to save the rearranged order of questions.

- Under the Scheduling tab, you can set a time limit for the specific dates and times that the Quiz will be displayed by selecting 'Active time limit' and entering the required Start and End dates and times. By selecting 'Activate repetitions' you can set a specific time and days in which your Quiz is shown on the screen.
- Under the Styling tab, you can choose an alternative Style Theme for your Quiz. You can create a custom background for your quiz by selecting 'Use custom image'. To set a custom background for your quiz select Choose File and navigate to the location of the image to use as a background image.
We recommend a resolution of 1920 x 1080 pixel for applications in landscape view. -
Add your Quiz to your uniFi+activ screen. You can do this from within the Quiz or in the Screen section:
In the Quiz:
- Under the Content tab click + Choose Screens , select your uniFi+activ screen and click Save
- Remember to click Save as draft or Save and Publish to save the coupling to the screen.
In the Screens section:
- Select Screens from the options on the Main screen.

- Click on
 in the content column of the screen list, go to the Widgets tab, select your Quiz and click Save
- When you've made all your desired configurations for your Quiz, select Save and Publish under the Content tab to publish your Quiz to your selected +activ.
- Great job! You've now created your first Quiz.
- To see how are your Quiz is presented on the uniFi+activ screen, go to the Screens section and click
 next to the screen you added your Quiz to.
- Select Widgets from the options on the Main screen.
- Quiz (uniFi+activ only)